Adding a webhook URL
To add a webhook endpoint via the Lago app, follow these steps:- Go to the Developers section via the sidebar;
- Open the Webhooks tab;
- Click Add a webhook;
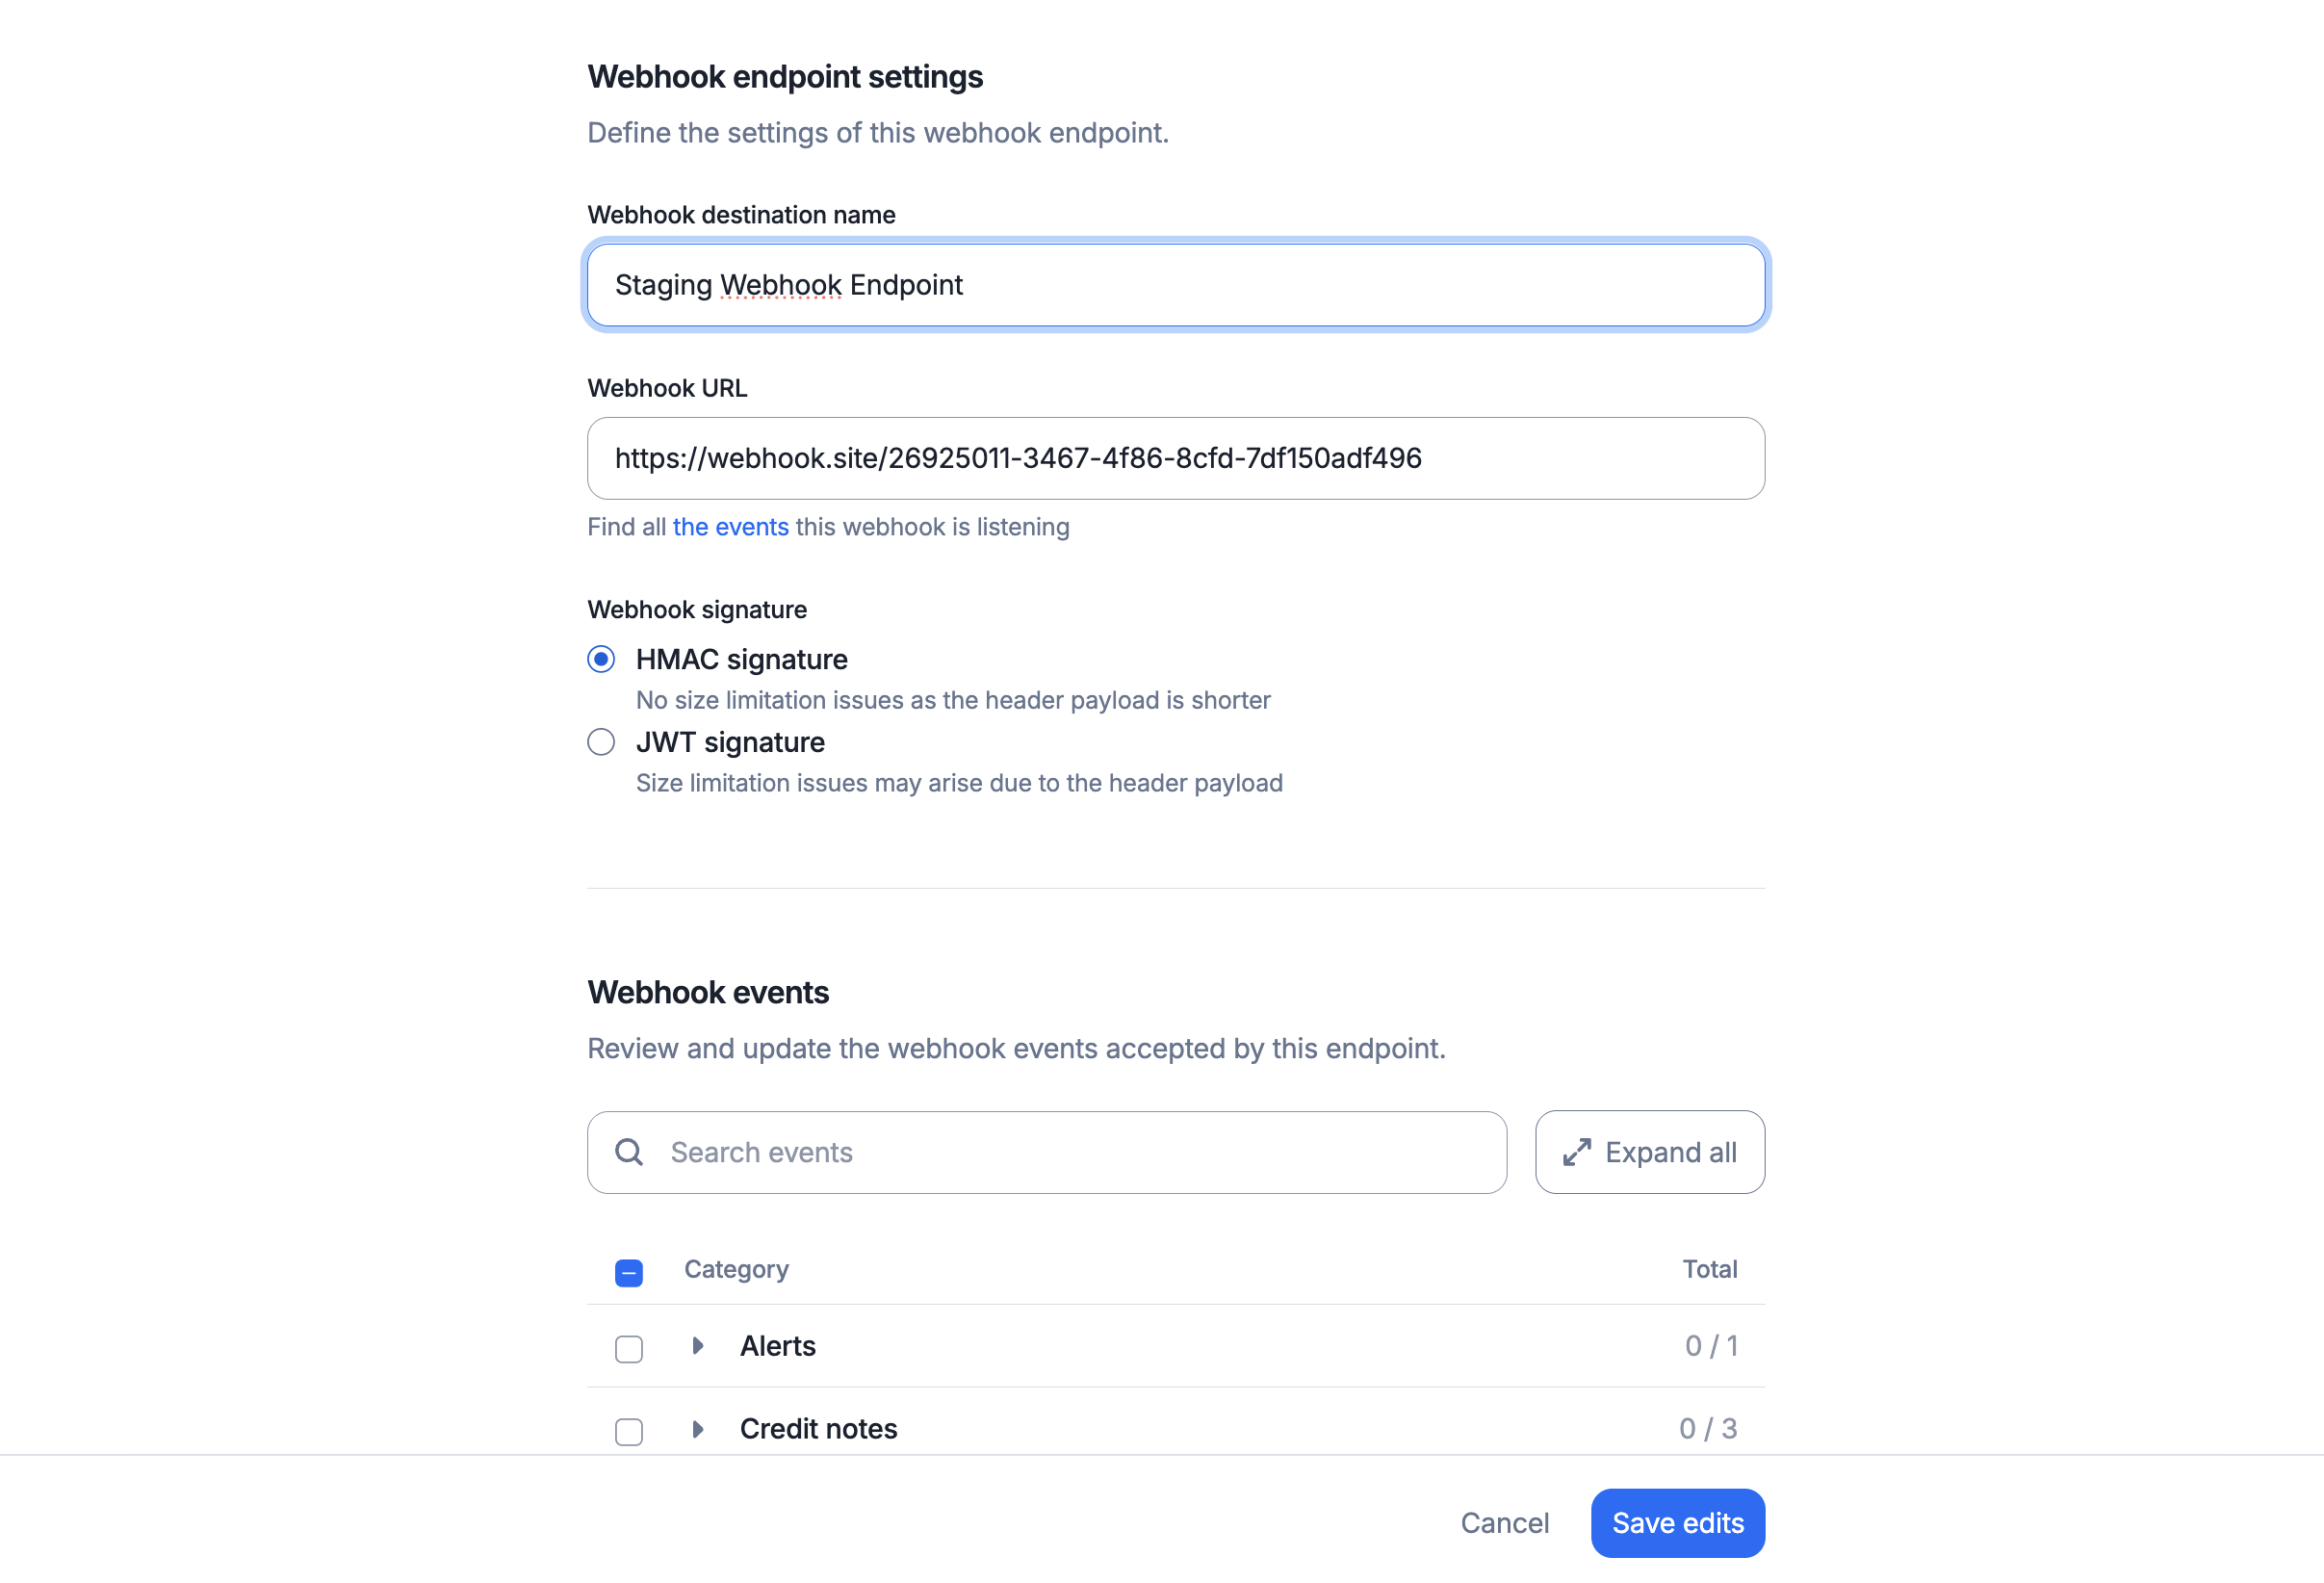
- Enter the webhook name and URL;
- Choose the webhook signature between HMAC and JWT;
- Define the events you want to listen to by selecting the relevant checkboxes; and
- Click Add webhook to confirm.
Note that you can add up to 10 webhook endpoints.
The webhook signature
By creating a webhook endpoint, you have two signature options.- Dashboard
- API
- The first is
JWT, with a possibly lengthy payload header and potential size limits; - The second is
HMAC, which features a shorter payload header and no size restrictions.
Locate your HMAC signature token
To find your HMAC signature token, navigate to Developers > Webhooks and locate the HMAC Signature Token. Then, reveal and copy the key.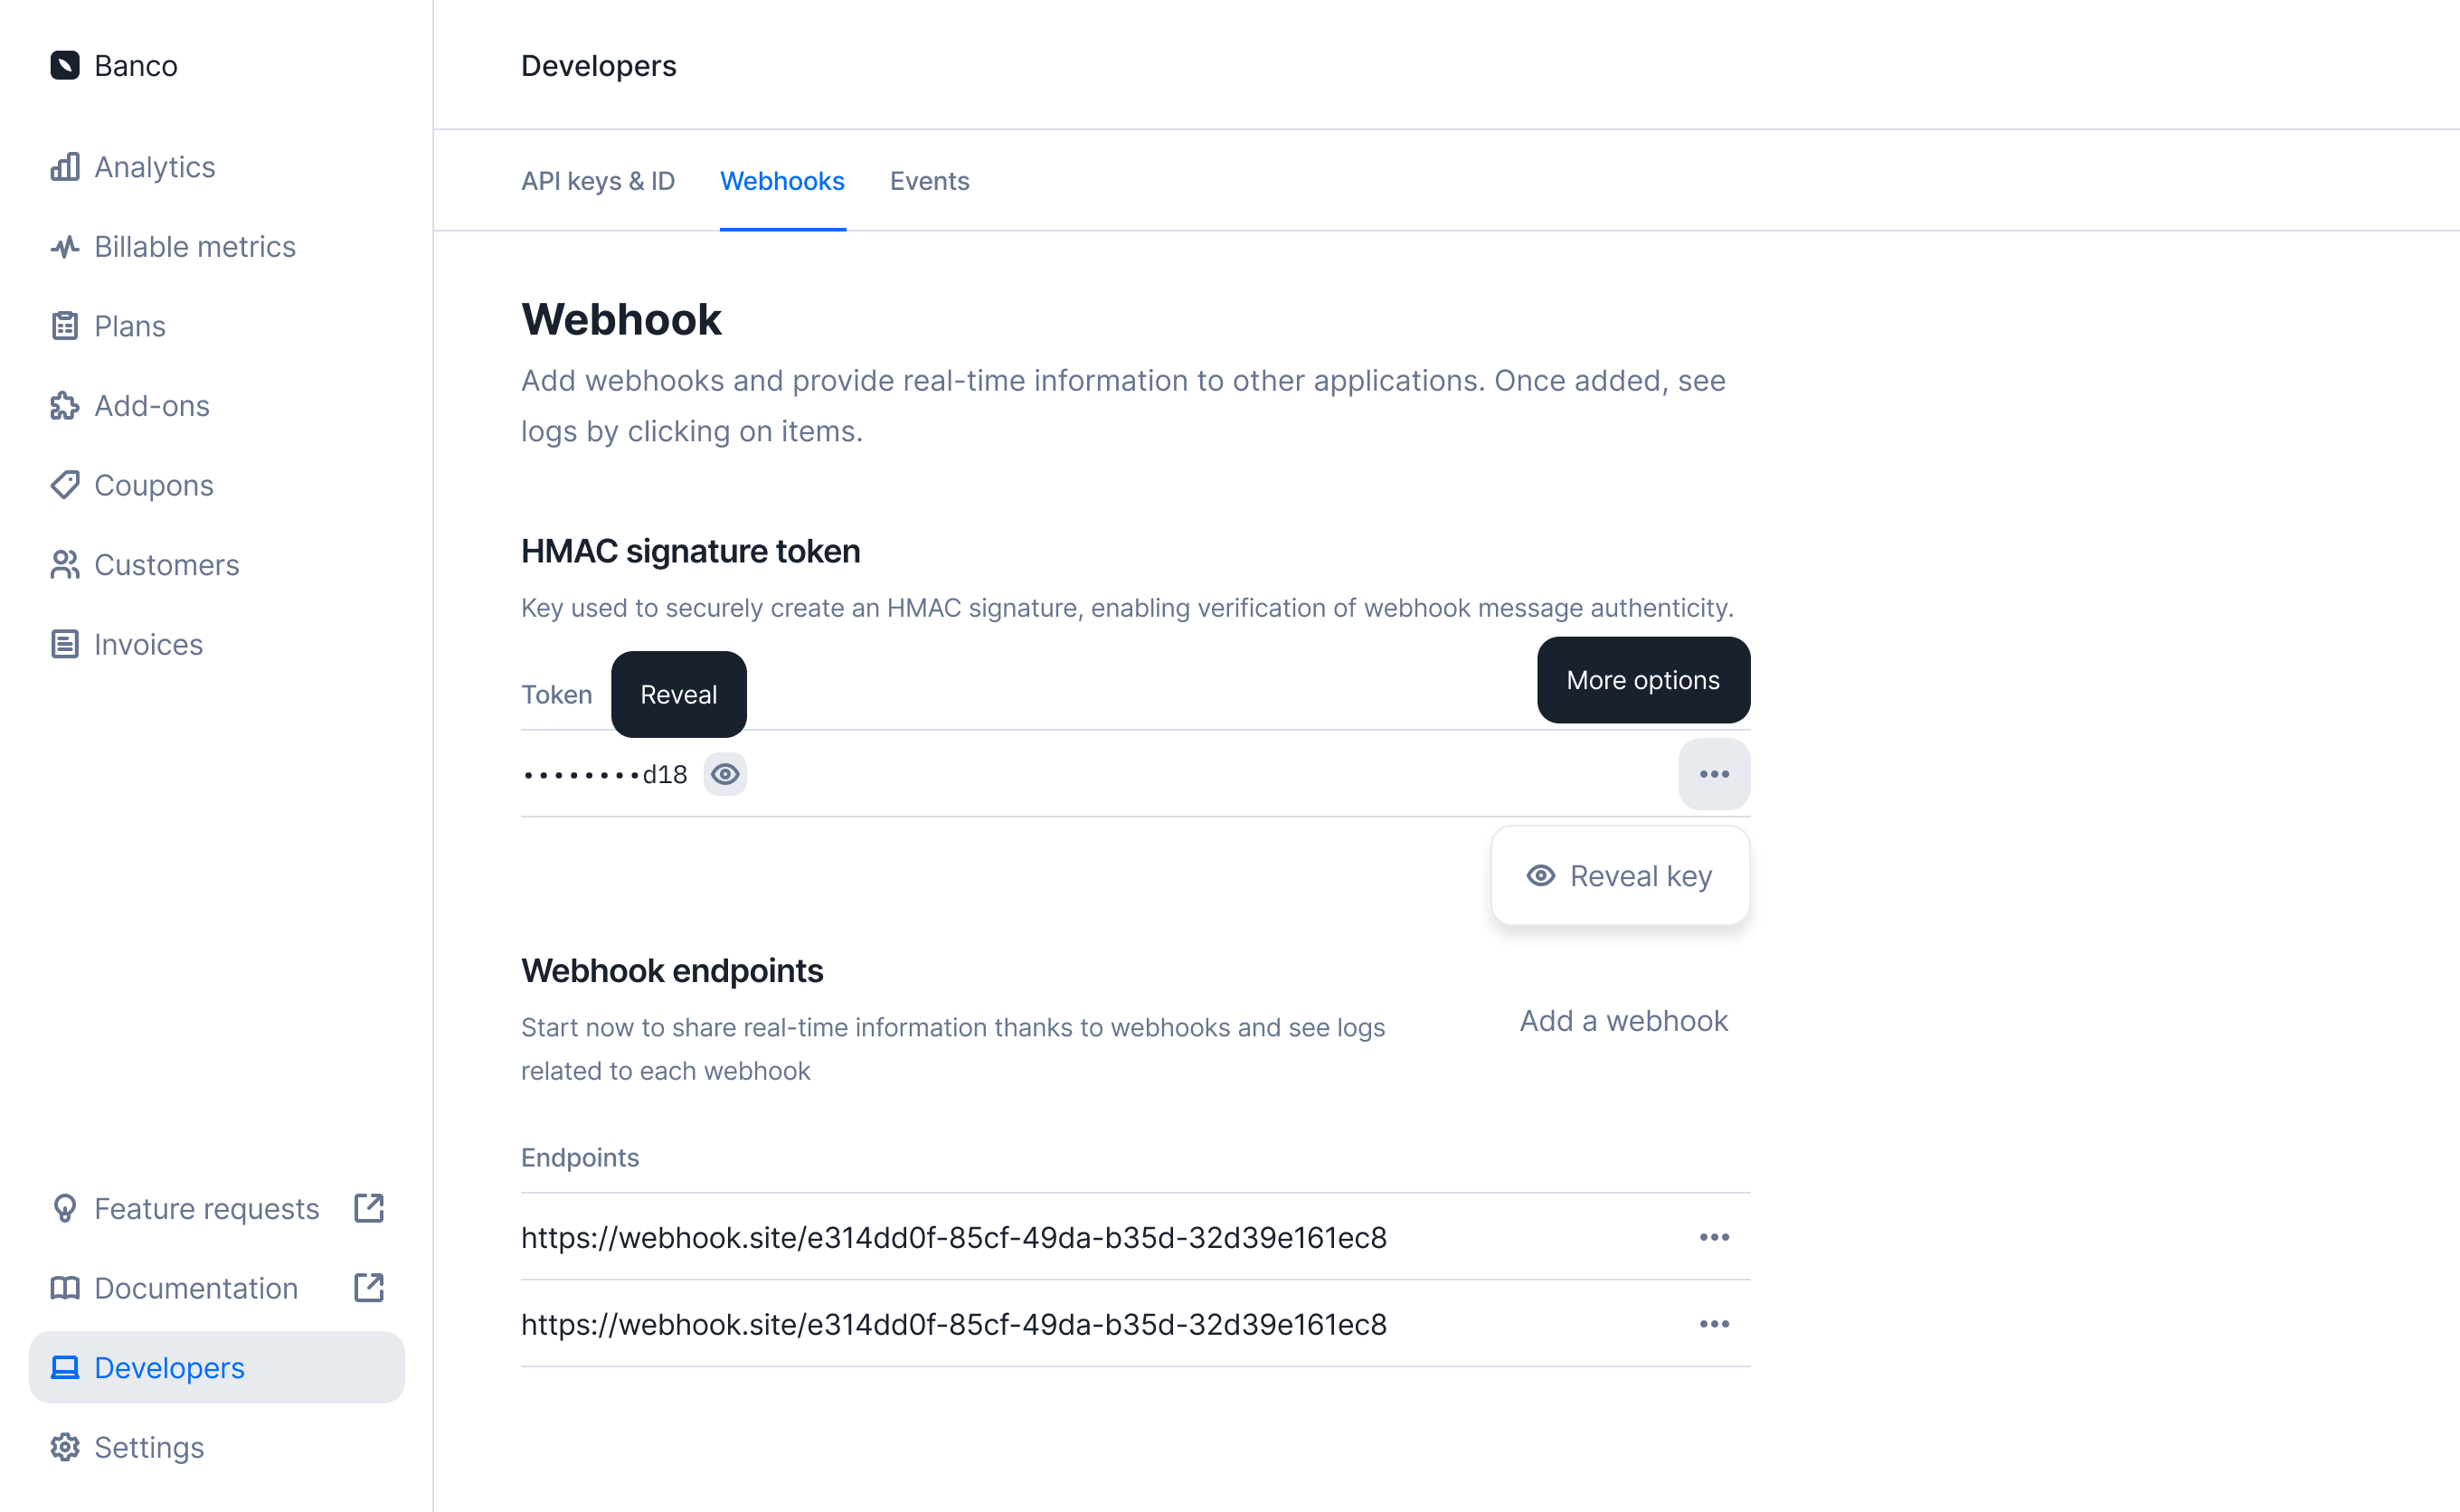
Accessing the webhook logs
Once a webhook is registered in the app, you can access the webhook logs:- Go to the Developers section via the sidebar;
- Open the Webhooks tab;
- Click on the webhook endpoint to see the list of events;
- Filter events by dates, types, HTTP status and status; and
- Click the reload icon to see new events (optional).
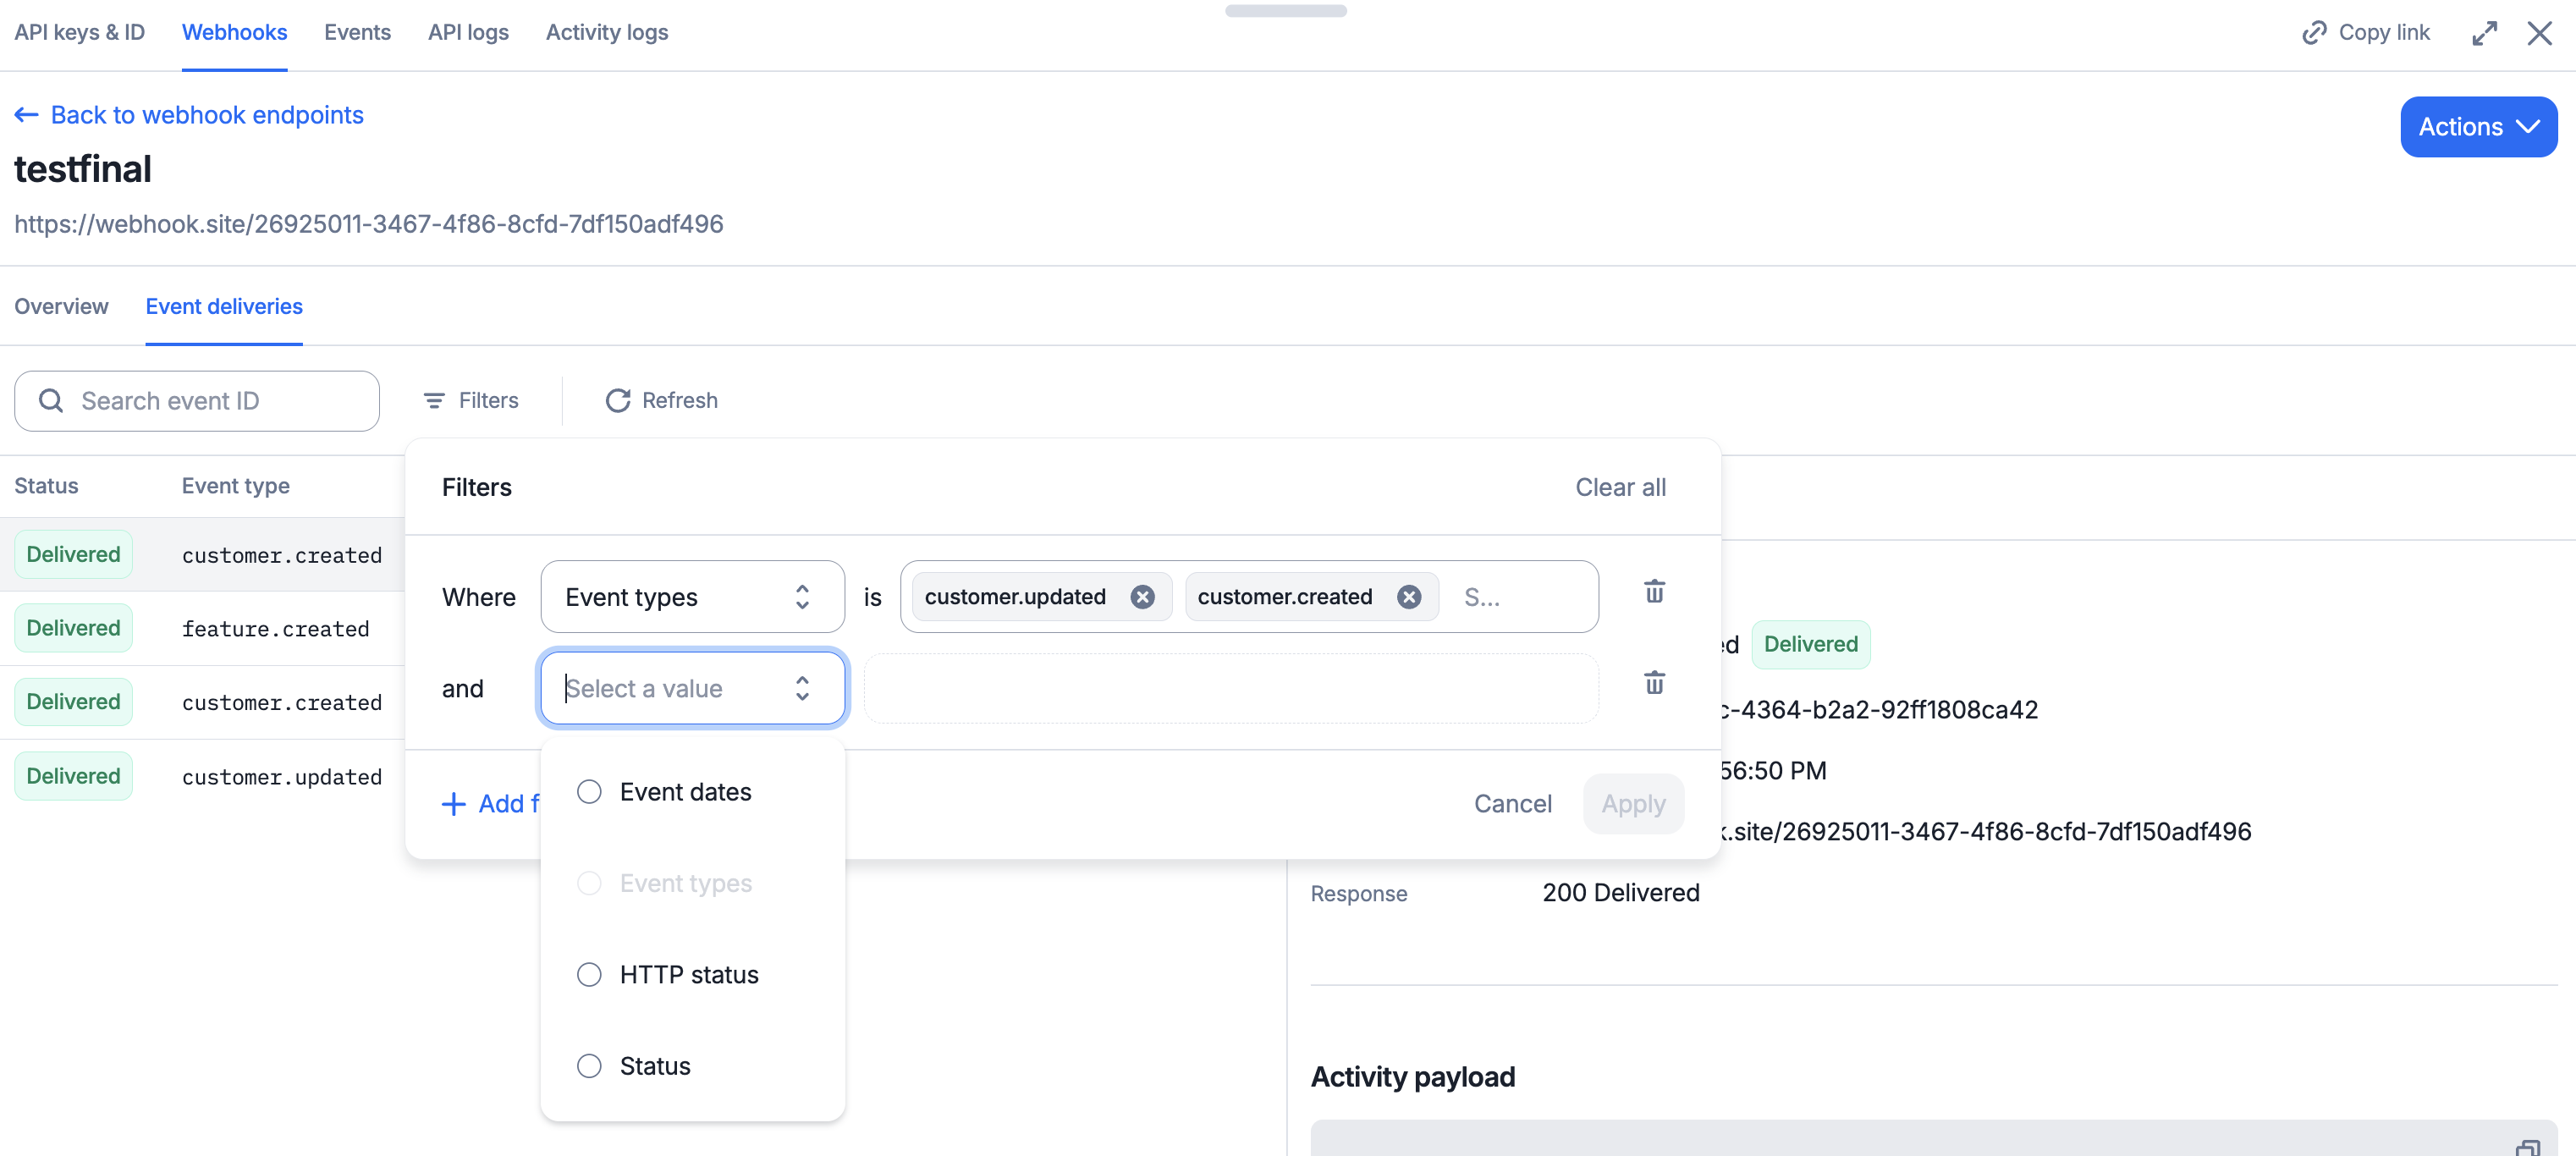
Accessing a specific event
You can see the details of a specific event by clicking on it. Depending on the event status, you will have access to two or three main blocks:- A list of properties, including:
- Timestamp: the timestamp of the event;
- Webhook URL: the URL used to listen to events;
- Unique key: idempotency key associated with the event;
- Webhook type: the webhook type used to understand the action triggered;
- Response: the response code (i.e. acknowledgement of receipt);
- Number of retries: if the event failed, the number of retries attempted;
- A JSON snippet with the arguments sent by Lago; and
- If the event failed, an error response will be included.
Errors and retries
Your webhook server should respond with a 2xx (200, 201, 202, 204) status code to acknowledge the receipt of the event. If the response is not supported as a success, Lago will consider it as failed.
Some events generated by Lago may not be received on the user side, which is why Lago displays an error status in the user interface.