Integration setup
Connect your GoCardless account
To connect to GoCardless through the user interface:- In the side menu, select “Settings”;
- Open the “Integrations” tab;
- Click “GoCardless” to create a connection;
- Give a name to this connection;
- Assign a code for easy identification;
- Click on “Connect to GoCardless” to be redirected to the GoCardless application;
- Create a GoCardless account or log in to your existing account; and
- Connect your account to be redirected to the Lago application.
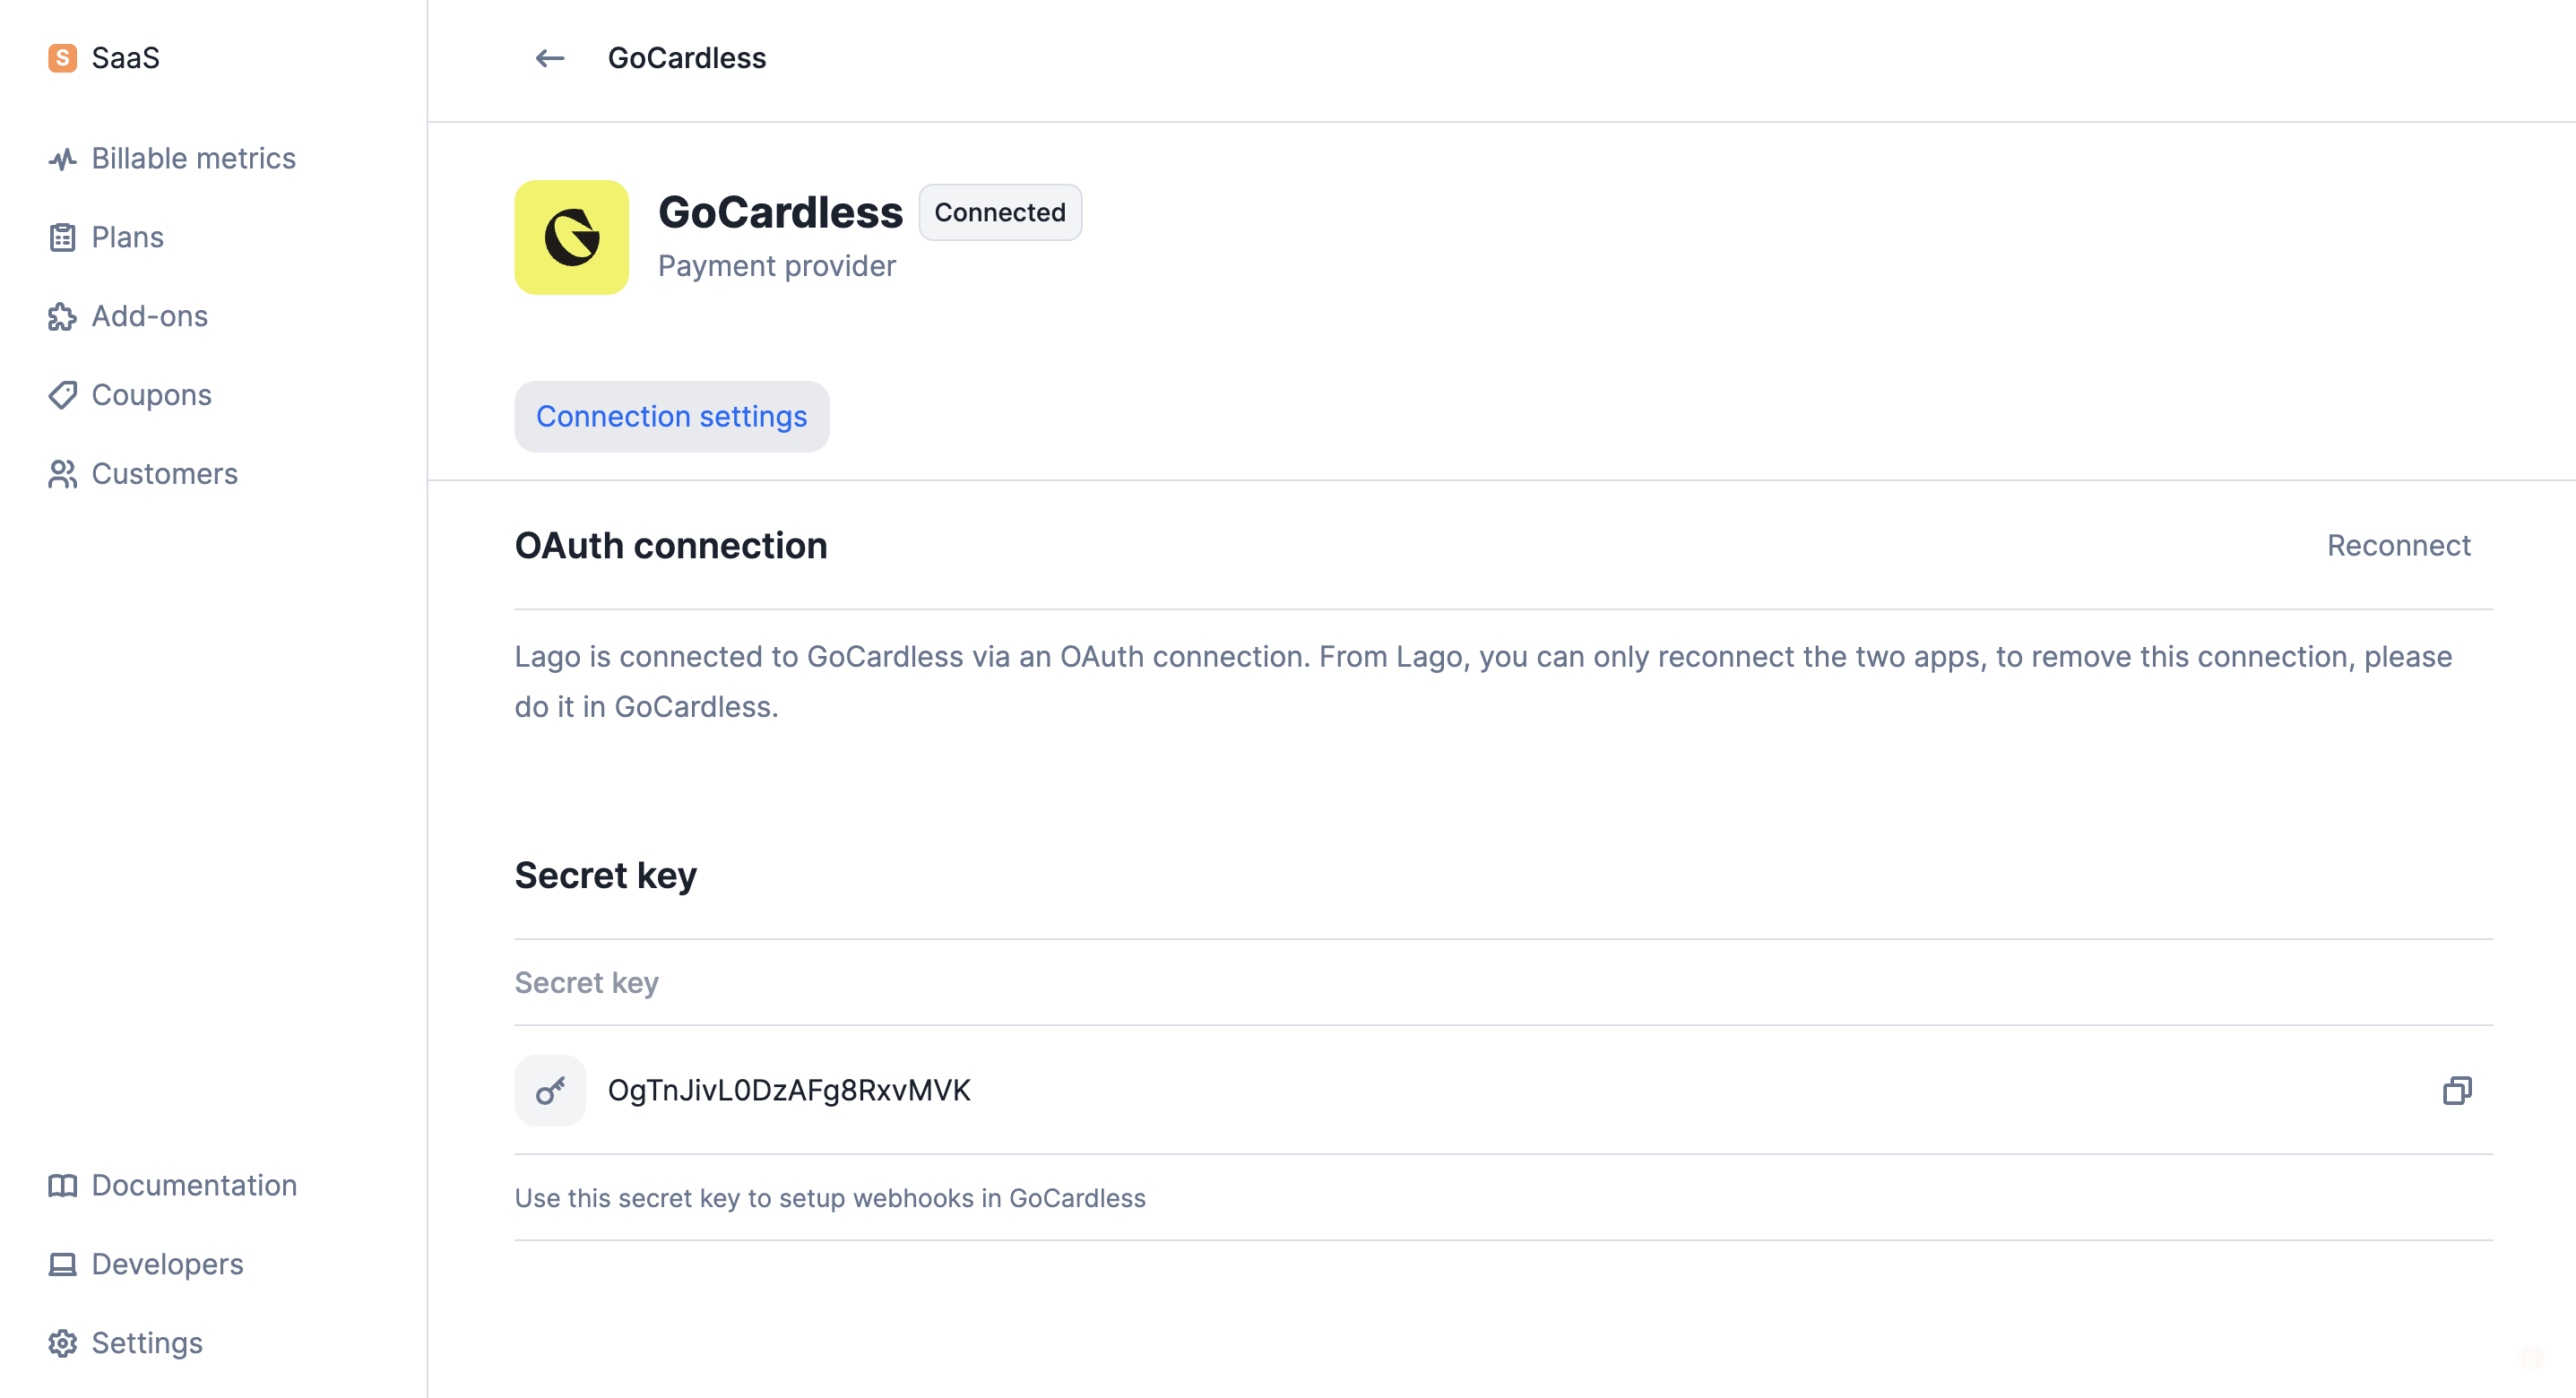
Active OAuth connection with GoCardless
Create webhook endpoints
If you want Lago to automatically retrieve the status of the payments processed via GoCardless, you must create a webhook endpoint in GoCardless. To do so:- Log in to your GoCardless account;
- Go to the “Developers” section;
- In the upper right corner, click “Create” and then select “Webhook endpoint”;
- Choose a name for this webhook (e.g. Lago);
- Enter the following URL:
https://api.getlago.com/webhooks/gocardless/{{organization_id}}?code={{connection_code}}(you must replaceorganization_idwith your Lago organization ID, and theconnection_codeby the targeted Lago connection); - Enter your secret key; and
- Click “Create webhook endpoint”.
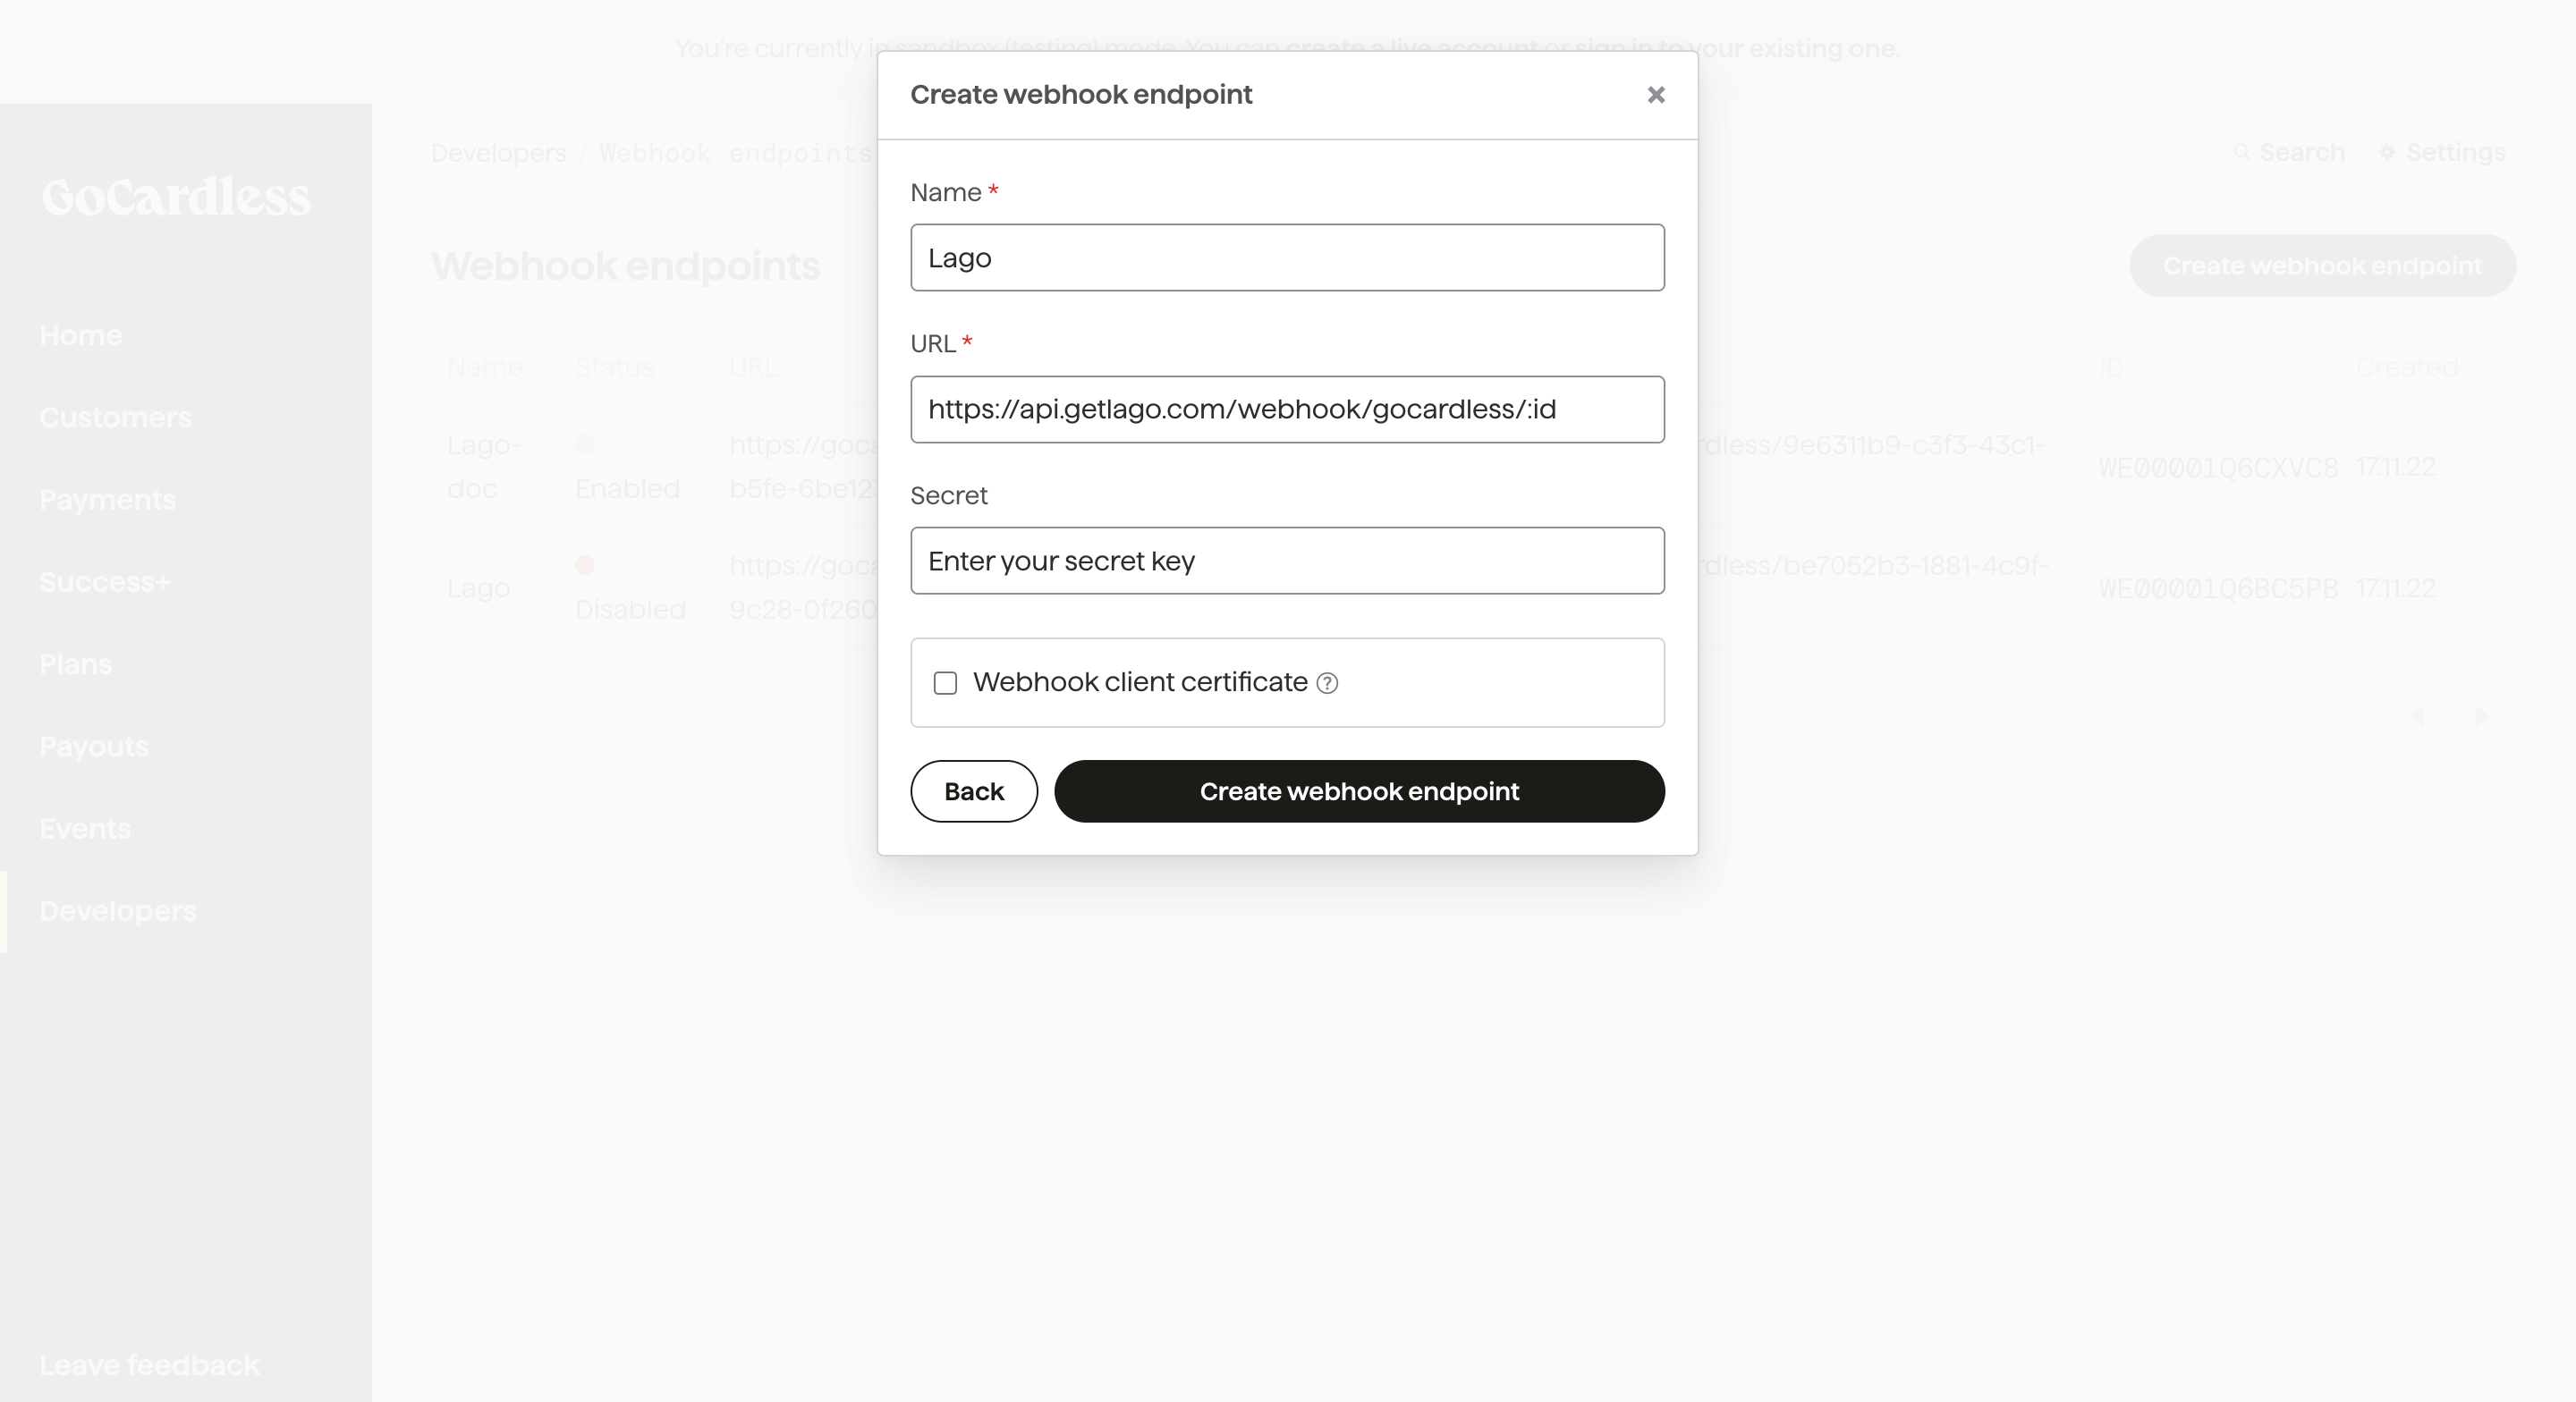
Webhook endpoint creation in GoCardless
- Go to the “Developers” section of the Lago application;
- In the “Webhooks” tab, click “Add a webhook” on the right;
- Enter your webhook URL; and
- Click “Add webhook” to confirm.
Redirect url after checkout
After establishing the connection with GoCardless, set a success URL where your end customer will be directed after completing the checkout. Please note that if it’s not defined, your end customer will be redirected to GoCardless’s website. Please note that you can edit or delete the redirect URL, and this will only affect new checkout URLs created.Customer information
To collect payments automatically, the customer must exist in both the Lago and GoCardless databases.New customer
If the customer does not already exist in GoCardless, you can first create them in Lago, either via the user interface or the API. When adding customer information, you must:- Provide the customer’s email address;
- Define GoCardless as the default payment provider;
- Select the GoCardless connected account;
- Leave the field associated with the GoCardless customer ID blank; and
- Enable the option to automatically create the customer in GoCardless.
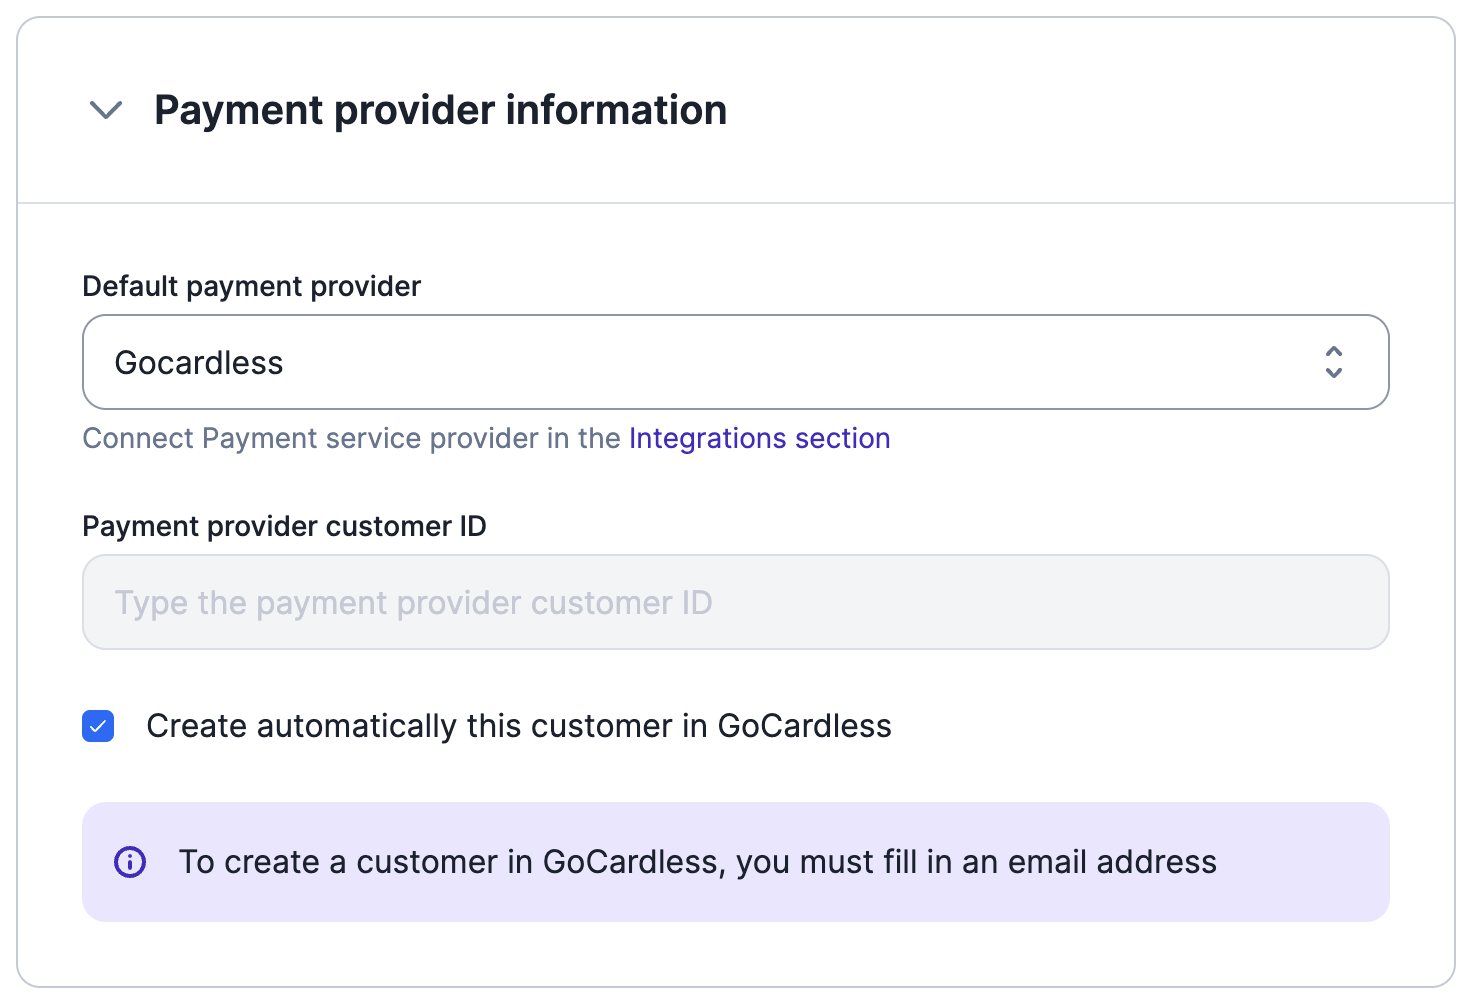
Creation of a new customer with GoCardless
customer.payment_provider_createdthat confirms the creation of the customer in GoCardless; andcustomer.checkout_url_generatedthat includes the checkout URL to set up the direct debit (learn more).
Existing customer
If the customer and direct debit mandate already exist in GoCardless, then you should create the customer record in Lago, either via the user interface or the API. When adding customer information, you must:- Provide the customer’s email address;
- Define GoCardless as the default payment provider;
- Select the GoCardless connected account;
- Provide the GoCardless customer ID; and
- Disable the option to automatically create the customer in GoCardless.
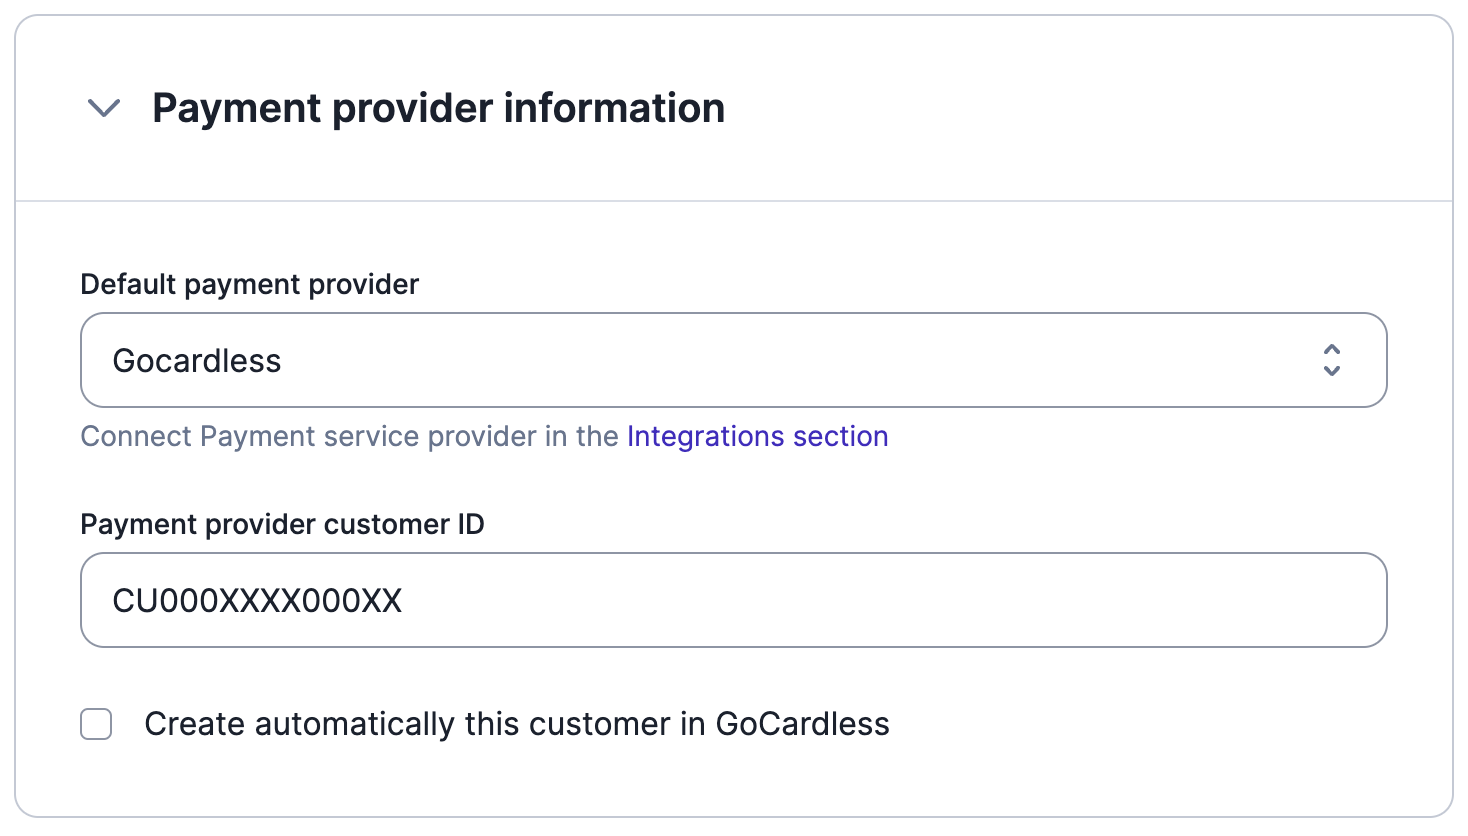
Migration of an existing GoCardless customer
Direct debit
To collect payments via direct debit, a mandate must be created. To do so:- Retrieve the checkout URL included in the
customer.checkout_url_generatedwebhook; and - Redirect your customer to the checkout page, so that they can complete the online form and approve the mandate.
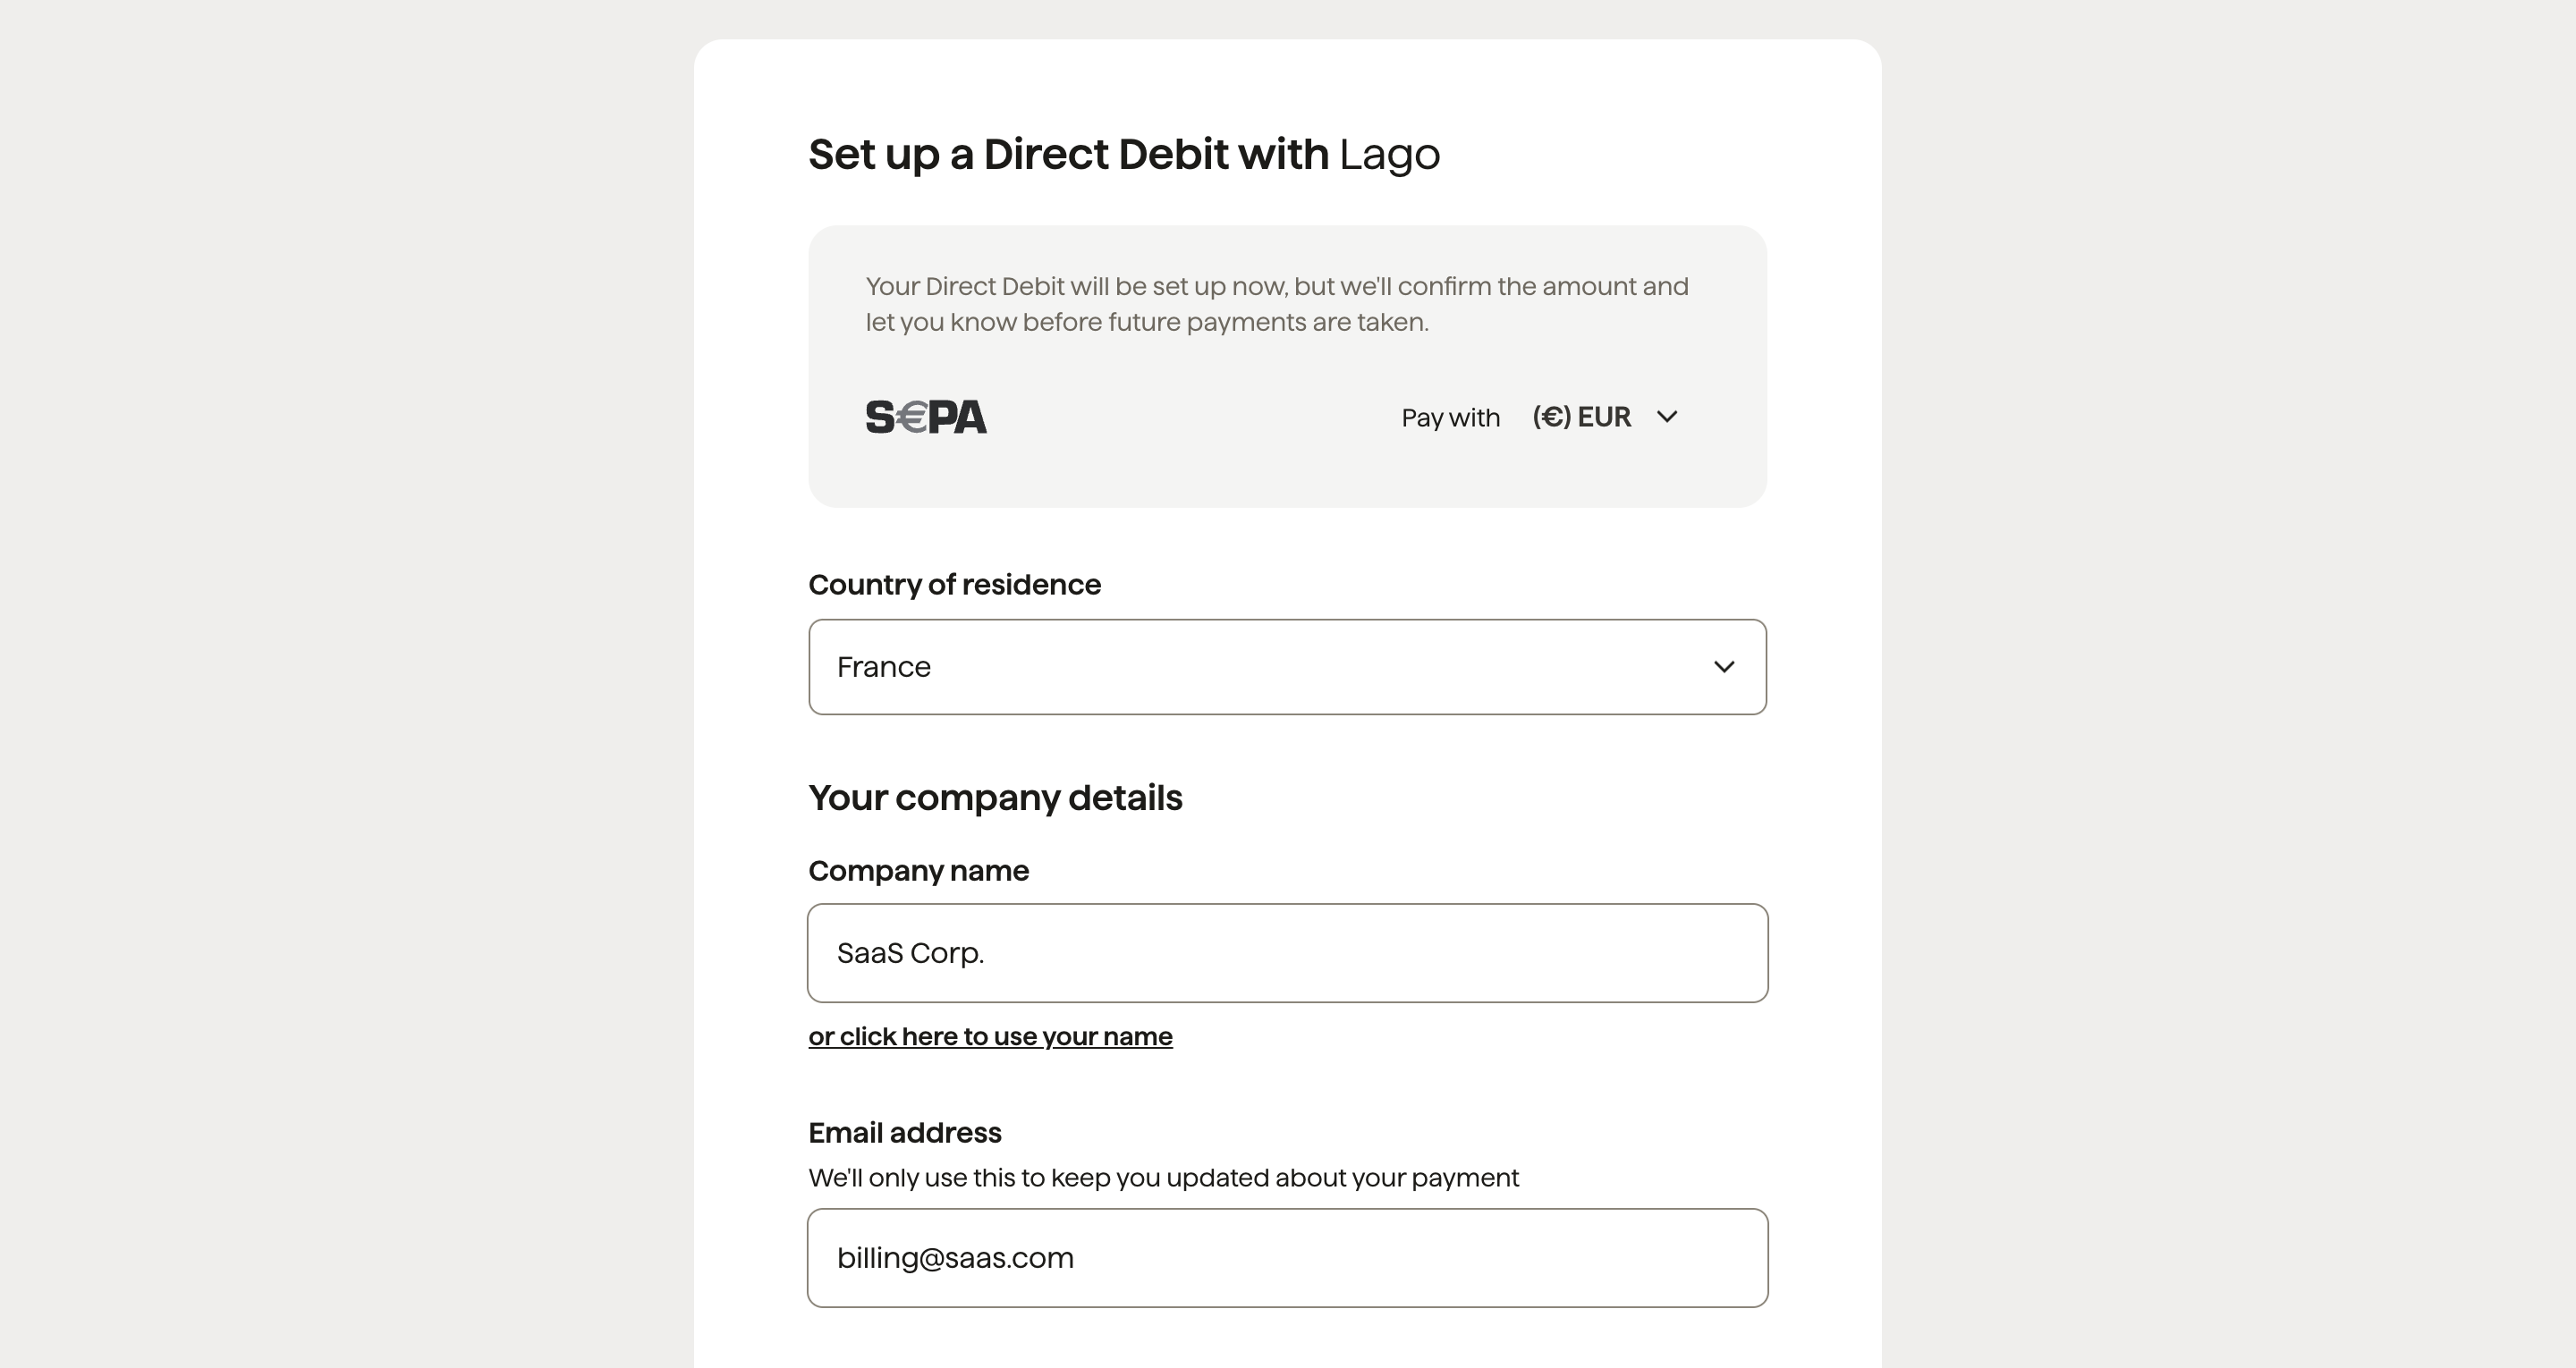
Direct debit setup with GoCardless
pending to succeeded.
If the payment fails, the status of the payment will switch from pending to
failed and Lago will generate an invoice.payment_failure
webhook.